Looking for something different for your 600? Try these:
http://www.nitroplanes.com/cafimarohofo.html
Monday, December 28, 2009
Kenny is at it again.
Funny, I started typing $$ when I meant 44 (freudian slip) as in "44 magnum" is in the sky!!
Anyway this is an assume craft and kudos to Ken for getting it together and in the air.
Hopefully you'll get to see it at the frozen finger fun fly on the 1st (Friday).
Tuesday, December 22, 2009
Frozen Finger Fun Fly (Polar Bear Fly-in)
News flash: We’re postponing the Frozen Finger Fly-in until Saturday because of the weather
Snake River Valley Modelers is hosting the Frozen Finger fun fly (Polar Bear Fly in) January 1st starting at 10:00am at the SRVM field. Anyone that has an AMA membership is welcome. There is a $5.00 landing fee to cover the hot chocolate and chili.
So come out and support SRVM and enjoy the chocolate, chili and comradeship!
Where: http://www.snakeriverrc.com/field.html
Date: 1/1/2010
Time: 10:00AM
Fee: $5.00
Tuesday, December 15, 2009
Setting your flight timer, the 80% rule
This rule protects both the lipo and the heli. Lipo voltage under load is fairly flat during hard discharges until you reach about 10% remaining capacity, then it drops very sharply. If this voltage drops too far it can damage the lipo. Likewise since voltage is directly related to motor speed, this sharp voltage drop will also cause an equal sharp drop in rpm and that can effect the helis flight.
The 80% rule is applied by monitoring the mAh used in flight and keeping it below 80% of the rated capacity of the pack. That 80% is calculated by
80% of pack mAh = pack mAh * .8
For example here is 80% for the following packs
3s 850mAh 15C lipo
850mAh * .8 = 680mAh
3s 2200mAh 45C lipo
2200mAh * .8 = 1760mAh
6s 2200mAh 20C lipo
2200mAh * .8 = 1760mAh
6s 5000mAh 25C lipo
5000mAh * .8 = 4000mAh
Notice how the number of cells and other ratings of the pack make no difference for the 80% rule. Only the capacity of the packs is used.
How to calculate % mAh used after a flight
So how do you figure out what % of a lipo has been used after a flight? You charge the lipo with a smart charger capable of displaying the total mAh put in during the charge. That number represents the mAh taken out during the flight. To find the percentage
mAh used / lipo capacity = % used
For example take a 2200mAh lipo. Say you use this pack and recharge it to find you put in 1550mAh. The % used is
1550mAh / 2200mAh = 70.5%
Determining flight time
Now that you know what the 80% rule is and how to calculate the % used during flight, now lets put it to use. All pilots, especially those flying electric models, should use a flight timer. So how do you know what time to use? Well you could ask around to see how long people fly but you would likely get answers ranging from 3min to 10min. In reality every heli has its own flight time and is is determined by a whole host of things from weight to setup to flight style. So you are going to have to determine the flight times of your helis yourself.
The good news is that it is very simple. You start by flying for a set amount of time. Next you recharge the flight pack to learn how much mAh you used. Then you adjust from there. It is best to start small with a say a 3min flight. Then recharge and see what it used. Then you can start adding minutes until you approach 80%.
Once you know how long you can fly for, you can decide what time to use and fly for that time until something changes. Remember that each pack can give different results, so you may need to run different times for different packs. Also things always change over time. So always watch what your charger puts back in after each flight, and adjust as needed.
WARNING: Flying in the cold weather with Lipos. Flying in cold weather will reduce the flight time of the battery. So make sure you keep your batteries warm and cut your flight times short until you know what you are taking out of the battery. THen you can adjust your timers. Otherwise you'll be doing some autos and shortening the life of your batteries.
Sunday, December 6, 2009
And you think you can auto??
Inverted, piro flip auto 4 feet off the deck.
IT ISN'T FAIR, I TELL YOU, IT JUST ISN'T FAIR!!
Friday, December 4, 2009
44Magnum maiden (It flies!!!)
After a few days of messing with the tail to find out the tail servo was bad out of the box 21/3/2009 Ken was able Maiden flight the 44 Magnum. The video is short because the cameraman became the head speed checker.
Wednesday, December 2, 2009
Sunday, November 29, 2009

Wednesday, November 25, 2009
Sunday, November 22, 2009

Tuesday, November 17, 2009
New Spartan Quark Gyro
The new Spartan Quark gyro is approaching its release date. This unit is very nice, it only measures 20×9mm and it is even easier to program than its predecessor. A new unit called “Fusion EDGE” will also be available in the very near future, which will allow for easy field programming, the original USB programming method is also compatible with the unit.
http://www.spartan-rc.com/products/quark/quark.php
http://www.spartan-rc.com/products/quark/quark.php
Friday, October 30, 2009
Tuesday, August 18, 2009
Curtis Youngblood blades
Curtis Youngblood has Cosmetically Flawed Blades - COSFLAW
These cosmetically flawed blades available directly through www.curtisyoungblood.com in all the current sizes we offer. These blades have slight cosmetic flaws in them such as over spray on the paint, slight weave defects or scratches. The blades are perfect other than these minor appearance issues and make a great practice blade for a great price. They have the words Cosmetic Flaw etched into the surface of the blade near the bolt hole,and come in a plain white box. These blades are available only through www.curtisyoungblood.com website, any others are not genuine Radix blades. Please email sales@curtisyoungblood.com for ordering instructions and availability, or give us a call at 979-779-2172. (Only available for U.S. shipping)
These cosmetically flawed blades available directly through www.curtisyoungblood.com in all the current sizes we offer. These blades have slight cosmetic flaws in them such as over spray on the paint, slight weave defects or scratches. The blades are perfect other than these minor appearance issues and make a great practice blade for a great price. They have the words Cosmetic Flaw etched into the surface of the blade near the bolt hole,and come in a plain white box. These blades are available only through www.curtisyoungblood.com website, any others are not genuine Radix blades. Please email sales@curtisyoungblood.com for ordering instructions and availability, or give us a call at 979-779-2172. (Only available for U.S. shipping)
Wednesday, August 5, 2009


Tuesday, July 28, 2009
A couple of hint's I'd offer to a new Raptor owner
1. Replace the tail hub with part number PV0499. It's a better design and will reduce the chance of the tail blowing apart, especially as you will likely be digging holes in the ground with the tail as you learn to hover.
2. Put some extra security measures to hold the pin in place for the rear tail gear - the red gear that the belt turns to spin the tail shaft. I use a piece of shrink wrap around that gear to secure the pin. I also drill a hole in the tail case to provide an inspection hole for that gear.
Before - what the pin looks like as it's slipping out

After - My fix, some shrink wrap around it

3. Replace all the fuel lines with quality fuel lines. The kit supplied fuel lines will liquefy inside the fuel tank, becoming roughly the consistency of green snot. I use black "clunk" fuel tank line made by Hayes. Also I like to put a spot of RTV silicon on the fuel tank nubs when putting the tank in the frame. Helps keep the frame from cutting into the tank.
4. when the opportunity presents itself you'll want to loctite the bearing onto the pinion gear with green loctite. This is a common wear item that can be completely avoided with loctite.
5. I have found I can remove a lot of slop in the controls by putting a bit of glue on the screws that have sleeves over them such as the collective arm pivots, seasaw screws, tail L crank pivot and other areas that use these screws. Especially the tail pitch fork to tail blade grip connections. minimize slop as much as possible while keeping everything operating smooth and low resistance as possible.
6. Check the balance of the main blades and tail blades. If you are flying with wood main blades (a good idea for learning with!) make SURE you glue the plastic blade roots on with epoxy after carefully cutting off the covering in that area. This is very important as you do not want a main blade shooting off the heli while it's hovering right in front of you!
There are a number of other good hints and whatnot at raptortechnique.com and myraptor.net
Credit given to jschenck of runryder
Thursday, July 16, 2009
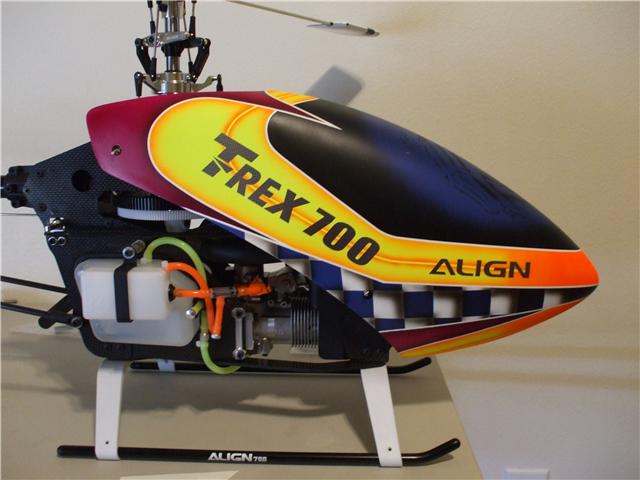
Welcome to Boise and the TREX600

The day he moved to Boise, was the day he walked into the LHS RCHobbies and walked out the Trex600E. Ross lets it rip in a local park! Nice Job!! and Thanks!
Monday, April 20, 2009
Nothing makes you shake like your first time.
Your first Bike, first kiss, first date, first....never mind! And the first time you start flipping the heli around trying to do some 3D.
Life is good!
Life is good!
Saturday, April 18, 2009
Heli Chat
Come and join us propeller heads at the shop on Wednesday Evenings (7:00PM - 8:00PM).
Bring your helis and radios as we'll shoot the bull on setup, exchange crash stories and if anyone is building one when can help put it together and exchange ideas on building, setup and radio programming.
Bring your helis and radios as we'll shoot the bull on setup, exchange crash stories and if anyone is building one when can help put it together and exchange ideas on building, setup and radio programming.
A123 Batteries for the T-Rex 500 and like Helis
A123 Racing now has a 6S1P 2300mAh packs for the T-Rex 500 and similar helis. Max amperage is 138A and weight is ~500g. Voltage is slightly lower at 19.8v (3.3v/cell nominal) instead of 22.2v so they will not have the equivalent kick for the same number of cells. So think of them as 5S packs but gear them appropriately for the actual voltage.
Also, you will need an ESC that you can set the low voltage cutoff appropriately (stock T-Rex 500 ESC will not work. Castle Creations and Scorpion are options).
These packs are Li-Ion packs using nanophosphate and are safer and more durable than traditional LiPos and can be quick charged (15-20min) and handle more cycles, but they do weigh a bit more.
You will also need a charger that can charge A123 cells.
Blade 400 First flights
Aftering learning to flip his CP Pro, living up to his word LHS customer taking his New e-flight Blade 400 for a ride.
Tuesday, April 14, 2009
RPM, Kv, And Current Rating
RPM stands for the number of rotations per minute, and signifies how fast a motor spins. Brushless motors are given a Kv rating, which is RPM per volt, that lets you determine how fast that motor will rotate with a given voltage supplied to it. A 980Kv motor powered by an 11.1V battery would spin at 980 x 11.1 = 10878 RPM with no load. The current rating specifies the maximum continuous and/or burst current that the motor is able to handle. When selecting a battery and speed control, choose ones with continuous current ratings equal to or greater that that of the motor.
Monday, April 13, 2009
What's up with Lipo Batteries?
Lithium Polymer batteries are used in many electronic devices. Cell Phone, Laptops, PDA's, Hearing Aids just to name a few. Most, if not all, lithium polymer batteries are not designed for RC use, we use them in different applications than they were designed for.
They are similar to Lithium Ion batteries in that they each have a nominal voltage of 3.6 volts, but dissimilar in that they do not have a hard metal casing but rather a flexible material encloses the chemicals inside. The "normal" lithium polymer batteries are thin rectangle shapes with two tabs on the top one positive one negative. The reason we use Lithium cells is that they are significantly lighter than comparable NiCad or NiMH batteries, which makes our planes fly longer and better.
Voltage and Cell Count:LiPolys act differently than NiCad or NiMH batteries do when charging and discharging. Lithium batteries are fully charged when each cell has a voltage of 4.2 volts. They are fully discharged when each cell has a voltage of 3.0 volts. It is important not to exceed both the high voltage of 4.2 volts and the low voltage of 3.0 volts. Exceeding these limits can harm the battery.
The way to ensure that you do not go below 3.0 volts while flying is to set the low voltage cutoff (LVC) of your electronic speed control (ESC). It important to use a programmable ESC since the correct voltage cutoff is critical to the life of your batteries. Use the ESC's programming mode to set the LVC to 3.0 volts per cell with a hard cutoff, or 3.3 volts per cell with a soft cutoff. If your ESC does not have hard or soft cutoff, use 3.0 volts per cell. You will know when flying that it is time to land when you experience a sudden drop in power caused by the LVC.
If your ESC has an automatic lithium mode. Use it, it will correctly sense the number of cells and set the auto cutoff appropriately.
If you have previously been flying with NiCad or NiMH batteries, switching over to lithium polymer will result in a different number of cells being used. If you had 6 to 7 round cells then 2 lithium polymer cells will correctly duplicate the voltage of those cells. If you had 10-11 cells then 3 lithium polymer cells would be right for you. There are a lot of 8 cell flyer's out there that are stuck between 2 and 3 cells. In my experience the best option is to determine how many watts you were using before and duplicate that with your LiPos, Motor, and Prop. For example. If you were running 8 cells (9.6volts) at 10 amps on a speed 400 airplane, then you have 9.6 x10, 96 watts. So if you went with 2 lithium polymer cells (7.2 volts nominal) then you'd need to change your prop such that you used 13 amps. If you went to 3 LiPoly's (10.8 volts nominal) then you'd need to reduce the amperage to 8.9 amps. These estimates are approximate, and some experimentation is required for best results but conserving Watts is a good way to start.
10C from 3S4P? Naming conventions explained. How fast a battery can discharge is it's maximum current capacity. Current is generally rated in C's for the battery. C is how long it takes to discharge the battery in fractions of an hour. For instance 1 C discharges the battery in 1/1 hours or 1 hour. 2 C discharges the battery in half an hour.
All RC batteries are rated in milli Amp hours. If a battery is rated at 2000 mAh and you discharge it at 2000mA (or 2 amps, 1 amp = 1000mA) it will be completely discharged in one hour. The C rating of the battery is thus based on its capacity. A 2000mAh cell discharged a 2 amps is being discharged at 1C (2000mA x 1), a 2000mAh cell discharged at 6 amps is being discharged at 3C( 2000mA x 3).
All batteries have limitations on how fast they can discharge. Because of this many LiPoly batteries are put in parallel to increase the current capacity of the battery pack. When 2 batteries are wired positive to positive and negative to negative they become like one battery with double the capacity. If you have 2 2000mAh cells and you wire them in parallel then the result is the same as 1 4000mAh cell. This 4000mAh cell has the same C rating as the original 2000mAh cells did. Thus if the 2000mAh cells could discharge at a maximum of 5C, or 10 amps then the new 4000mAh cell can also discharge at 5C or (4000mA x 5) 20 amps. This method of battery pack building allows us to use LiPoly batteries at higher currents than single cells could produce.
The naming convention that allows you to decipher how many cells are in parallel and how many are in series is the XSXP method. The number in front of the S represents the number of series cells in the pack so 3S means it's a 3 cell pack. The number in front of P means the number of cells in parallel. So a 3S4P pack of 2100mAh cells has a total of 12 cells inside. It will have the voltage of any other 3S pack since the number of cells in series determines the voltage. It will have the current handling of 4 times the maximum C rating of the 12 individual cells. So say our 3S4P pack had a maximum discharge of 6C. That means that it has a nominal voltage of 10.8 volts (3x3.6) and a maximum discharge rate of 50.4 amps (2100mAh x 6Cx4P ).
Sunday, April 12, 2009
Saturday, April 11, 2009
Throttle Hold (For emergency autorotations)
I often get asked about the importance of setting up throttle hold and here's an attempt at explaining it:
Autorotation - A way of 'gliding' a helicopter safely back to the ground without engine power. Autorotation is in itself a very demanding maneuver and challenging to execute correctly. To achieve this you need to be able to set the main rotor blades to a negative pitch. This allows you to keep the head speed up while you a rapidly descending, as you get closer to your landing you’ll want to “Flare” and give it positive pitch to slow the helicopter for your landing.
So the importance of programming throttle hold is if anything goes wrong with you heli during flight, say like a belt break, or something goes wrong with the tail. This would cause the tail to spin with the torque of the main blades. If you added more throttle it would only get worse. So in this situation, throttle hold (depending on your radio and programming) would cut the power of the engine, reducing the torque of the main blades which would cause the tail spin to stop and allow you to land your heli as seen in this video.
Pitch and throttle curves are totally personal preference though. These are only possibilities. I myself fly all modes with the same pitch range (+/-10 degrees or +/-11 degrees or +/- 12 degrees) This way I'm totally used to how the collective responds through all flight modes and it never changes.
Many people actually prefer it this way, although it's the most sensitive on the collective. It requires very subtle movements to climb or descend in a hover rapidly.
Here's a video to show you throttle hold in action:
Subscribe to:
Posts (Atom)
